Build Your First Mobile App With The Ionic Framework - Part 6
Let's have a look at how to deploy an Ionic app, specifically for testers, using the Ionic View app on iOS and Android devices. This post will not cover deployment to the App Stores, but I'll give you some links to articles that will guide you through that process.
==Update: This tutorial is for Ionic 1.x, you can find the Ionic 2 tutorial here.==
This post is part of a multi-part series:
Part 1 - Introduction to Hybrid Mobile Apps
Part 2 - Set Up your Development Environment
Part 3 - Mockup with Ionic Creator
Part 4 - Test on Browsers, Emulators and Mobile Devices
Part 5 - Build out the App
Part 6 - Deploy to Testers with Ionic View (this post)
###Deploying Apps to Testers Before we dive into Ionic View, let's have a look first at the current process for deploying apps for testing.
####TestFlight Beta Testing For iOS apps you'll use TestFlight Beta Testing which is available through iTunes Connect. You set up your beta releases and testers through iTunes Connect and send an email to your tester when you release a version of the app to test. Your tester will need to install the TestFlight app and through that app the beta releases of your app will be available to install on the tester's device.
Watch this video for an overview of TestFlight.
####Google Play Beta Testing Testing Android mobile apps is configured within the Google Play Developer Console. You can upload your app and select Google Groups or Communities to test your app. They will receive an email with a link and that will allow them to download the beta release of the app straight from the Google Play Store. So for Android you don't need a separate app like TestFlight to download the app.
###Ionic View Ionic View is a mobile app that is available on iOS and Android and it allows you to view apps that are uploaded to the Ionic server.
To upload your app, go to your app folder, in our case that's DinnerApp, and run this command:
$ ionic uploadThe first time you run this command you'll be asked to sign in or create an account. You can sign in with the same account you set up for Ionic Creator in Part 3 of this tutorial.
When it's done uploading the app, you'll see the message Successfully uploaded (identifier), the identifier between the parentheses is your app ID in Ionic View.
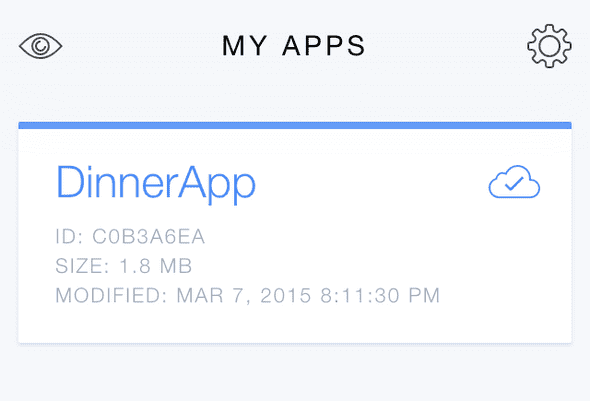
Once your app is uploaded, sign in on the Ionic View app on your mobile device and you'll see your app displayed there. Tap on it and choose DOWNLOAD APP in the menu. When that is done you can choose VIEW APP to load your app.
Now anyone who has the app ID can install the Ionic View app on their mobile device and download the app. The ID for DinnerApp is C0B3A6EA, you can download that in Ionic View and see how it works.
Both iOS and Android provide excellent ways of deploying our apps to testers and it's all integrated in the process to publish the app to the App Stores.
So, why would you use Ionic View?
Let's say you just built a prototype of your mobile app and want to send that on to a couple of people to have a look at it.
When you do it through TestFlight and Google Play you'll have to have your developer accounts set up, package the apps, upload them, invite your testers, etc.
With Ionic View, you just upload it to the Ionic server and let your tester know the ID of the app. It doesn't matter if the tester is on an iOS or Android device, because it will be available on the Ionic View app on both platforms.
So Ionic View doesn't replace TestFlight or Google Play Beta Testing, but it can be very valuable when you're prototyping your app and just want to get it out to testers fast.
###Publishing Apps As promised, here are some links to help you get your app into the App Stores:
- How to Submit Your App to Apple: From No Account to App Store, Part 1
- How to Submit Your App to Apple: From No Account to App Store, Part 2
- Ionic Tutorial on Publishing Your App To The Google Play Store
This is the final part of the "Build Your First Mobile App With The Ionic Framework" tutorial. I hope you found it helpful for getting started with mobile app development. Please share this tutorial with anyone you think might benefit from it.
Let me know what you think of this tutorial in the comments, I'd really appreciate your feedback. Thanks!
